New equipment is only half the story. The weeks after a heating system installation are when performance settles, small mistakes surface, and the building’s quirks show themselves. A clean sign-off doesn’t guarantee quiet operation, even heat, or low bills. What you do immediately after the installers sweep up makes a real difference for the next 15 years.
This is a walk-through of the checks I perform on every job, whether it is a like-for-like furnace swap, a boiler conversion, or a heat pump replacing oil equipment. The steps are simple on paper, but the value lies in the judgment to interpret what you see, the patience to track changes over several days, and the discipline to correct what many homeowners ignore.
Why a meticulous post-install matters
Installers work under time pressure. Access is tight, measurements vary from drawings, and a dozen decisions get made in the moment. No one aims for shortcuts, but I have opened brand-new air handlers with kinked drain tubing, seen condensing boiler traps left dry, and found heat pumps charged for 45 degrees and then asked to run at 20. A thorough post-install check bridges the gap between a functional start-up and a system that runs efficiently through its first winter.
Energy savings are also at stake. Field data shows that improper airflow and misadjusted combustion trim can erase 10 to 25 percent of expected efficiency on furnaces and boilers. Even on variable-speed equipment, small things like a missing outdoor sensor or incorrect thermostat lockouts can push the system into less efficient modes. Correcting those issues early protects the investment you made during heating replacement.
Paperwork first: serials, settings, and warranties
Before you turn a screw or touch a valve, capture the paper and the data. It takes fifteen minutes and saves headaches.
Record the model and serial numbers of the heating unit, the blower or air handler, the outdoor section if it is a heat pump, and any accessories like humidifiers, zone panels, and smart thermostats. Snap photos of rating plates, gas valve tags, and the wiring diagram inside the blower door. Register the equipment for warranty while the documents are still in a neat stack. Many manufacturers extend parts coverage from 5 years to 10 if you register within a specific window, sometimes 60 to 90 days.
Ask for the commissioning sheet. Good installers log static pressure, temperature rise, refrigerant superheat/subcooling, combustion readings, and control setup. If you do not see numbers, you do not have proof the system was tuned. That does not mean it wasn’t, but it means you need to verify.
Make sure your thermostat and any app integrations are linked to the correct equipment type. I have seen heat pump thermostats left on “furnace” and vice versa, which leads to confusing calls and poor operation.
Power, polarity, and safety devices
A surprising number of intermittent nuisances trace back to simple electrical issues. Verify that the disconnects are within sight of the equipment and labeled. At the main unit, check that hot, neutral, and ground are landed correctly and tight. On furnaces and air handlers, light dimming or LED flicker elsewhere during blower start can hint at loose neutrals or undersized circuits.
If your heating system installation included a new outdoor condenser or heat pump, test the service disconnect. Pull it, inspect for scorching or loose clips, and reseat with a firm push. On boiler systems, confirm that the emergency shutoff switch at the stairwell or mechanical room entrance kills power to the boiler and all associated pumps.
Test the safety chain deliberately. Open the blower door while running and confirm the door switch kills the system. Trip the condensate pan float by lifting it slightly and listen for the unit to shut down or the condensate pump to kick on. For boilers, lift the low water cutoff test lever if present and verify burner lockout. These are five-minute checks that prevent expensive water and heat damage.
Gas and combustion checks for furnaces and boilers
If your installation involved gas-fired equipment, take combustion numbers seriously. They are not only for code compliance; they affect fuel bills and longevity.
After 10 to 15 minutes of steady operation, measure oxygen or carbon dioxide, carbon monoxide, flue temperature, and draft pressure where appropriate. On sealed combustion furnaces, typical O2 will fall around 5 to 7 percent, with CO ideally under 50 ppm air-free. Draft across a natural-draft water heater sharing a flue should remain stable when the furnace runs at high fire. If CO spikes when another appliance starts, you have a venting or makeup air problem.
Check manifold gas pressure with a manometer while the furnace is at high fire. Most residential natural gas furnaces target around 3.5 inches water column. Too low and you get lazy flame and poor heat rise, too high and you risk overheating and high CO. Verify that the installer adjusted two-stage or modulating gas valves according to the manufacturer’s commissioning steps, not just factory defaults.
For condensing boilers, confirm that the condensate trap is primed and trapping. Dry traps let flue gas escape and can corrode the cabinet in months. Inspect the condensate neutralizer if the discharge ties into copper or cast iron. A fresh neutralizer cartridge or media canister costs little compared to the damage from acidic condensate.
Airflow, ducts, and static pressure
On a forced-air system, airflow is the backbone. I do not accept “it feels fine” as evidence. Use numbers.
Static pressure tells you how hard the blower works to move air through the ducts and coil. Manufacturers give a maximum external static pressure, often around 0.5 inches water column, for rated airflow. I measure before and after the unit with a manometer, subtract, and compare to the curve for the installed blower speed. If you see total external static above the rated max, you can expect noise, uneven heating, and short equipment life. Real-world fixes range from opening more return paths to swapping restrictive filters to upsizing return duct trunks. I often find that adding one well-placed return in a closed-off room drops static by 0.1 inches and transforms comfort.
Verify the temperature rise across the furnace heat exchanger or across the air handler’s hydronic coil. The rating plate will show a range, say 35 to 65 degrees. A 90,000 BTU furnace that shows only a 15-degree rise at full fire is pushing too much air, cooling the exchanger and throwing heat into ductwork that may not be insulated. A 70-degree rise suggests low airflow or blocked filters that can trip high limits.
Pay attention to sound. A violent whoosh at start often points to a restrictive return plenum or a filter rack that is undersized. A whistle might be a leaky seam. On several heating replacement projects, we solved “noisy new furnace” complaints by sealing a handful of return leaks and adding a deeper media filter cabinet instead of the thin 1-inch slot filter.
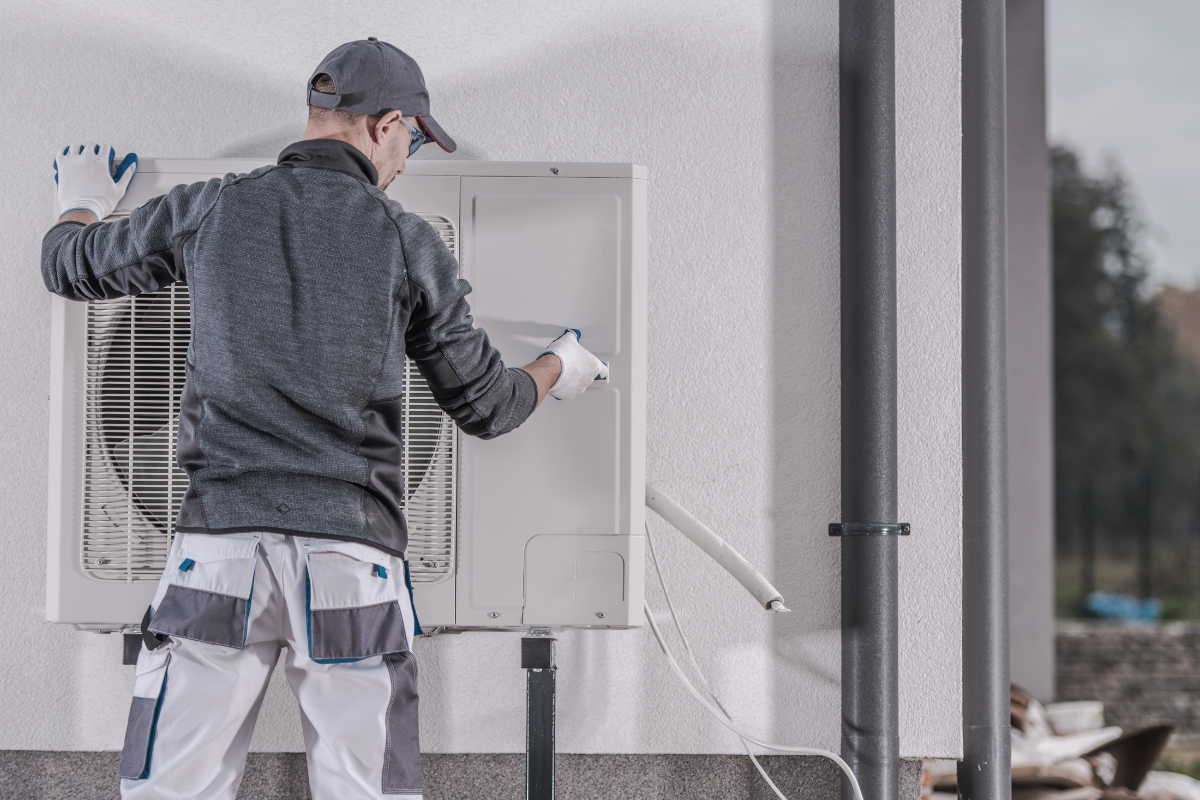
Refrigerant checks for heat pumps
For a heat pump, you cannot evaluate performance at a single outdoor temperature and call it done. Still, on day one, look at superheat, subcooling, and line temperature to ensure the charge and metering device behave. Manufacturers provide targets for specific conditions; treat them as guideposts, not absolutes, because small measurement errors compound.
Monitor defrost setup. Modern systems often use demand defrost that needs the outdoor sensor to be correctly mounted and the control board to recognize the coil temperature. A mislocated sensor or wrong dip switch position leads to either excessive frost build-up, which slashes capacity, or overactive defrost, which wastes energy and feels drafty indoors.
If the heat pump uses auxiliary heat strips or a dual-fuel configuration with a gas furnace, confirm the lockout temperatures on the thermostat or control board. I usually set the balance point based on electric rates and house envelope. In a tight home with cheap electricity, let the heat pump carry the load down to a lower temperature. In an older, leaky home with high electric rates, lock out the heat pump earlier and let the gas furnace run. The wrong choice can swing monthly bills by hundreds in a cold month.
Hydronic systems: air, flow, and balancing
On boiler-based heating, air management is everything. Trapped air creates cold radiators, noisy pipes, and pump cavitation. After a heating unit installation with new piping or radiators, I schedule at least two bleeding sessions as the system runs and microbubbles work their way to vents.
Inspect the air separator and auto-vents. On a modern setup, the circulator belongs on the supply side pumping away from the expansion tank. That configuration makes bleeding easier and keeps air out of the pump. If the installer inherited an older pump-on-return setup, not all is lost, but you will likely need extra attention during the first weeks.
Set circulator speeds and zone valve timing so that flows match the heat emitters. I see many systems with oversized pumps blasting through baseboards, which raises return water temperature and robs condensing boilers of efficiency. Small adjustments to a variable-speed pump or a delta-T circulator can pull return temps below 130 degrees more often, improving seasonal efficiency.
If you have radiant floor heating, verify mixing valve operation and floor surface temperatures. An infrared thermometer makes quick work of this. You should see consistent surface temps, with mild variation near exterior walls. Hot streaks or cold patches indicate air, a stuck actuator, or a kinked loop.
Venting, clearances, and outside terminations
Step outside in daylight and inspect terminations. For sealed combustion furnaces and condensing boilers, intake and exhaust should be separated per manufacturer instructions and clear of snow lines and shrubs. A couple of inches of drifted snow on the intake can starve combustion air and cause nuisance lockouts. Where exhaust plumes stain siding, look for poor slope back to the unit or a missing support that lets water settle and freeze.
Inside, verify vent slope and support. PVC flue should pitch back toward the appliance at roughly a quarter inch per foot to return condensate. Sagging sections trap water, which leads to freeze-ups or corrosion at joints. On a metal B-vent shared with a water heater, check the draft hood and test with a cold start to catch any backdraft during simultaneous operation.
Clearances around the heating unit matter more than it seems. A furnace squeezed tight to a partition can recirculate its own cabinet heat and run hotter than intended. A boiler placed next to stacked storage smothers service access and invites errors down the line. I like at least 24 inches clear in front and reasonable side access to gas valves, pumps, and electrical.
Condensate management
New high-efficiency equipment condenses water as part of normal operation. Plan for gallons per day on cold stretches. Test the entire path from coil or heat exchanger to drain or pump. Pour a quart of water directly into the primary drain pan and watch for leaks, slow drains, and pump operation. A properly installed trap is essential on negative-pressure drain connections; without it, the blower can suck air up the drain and hold water in the pan until it overflows.
On attic air handlers, the secondary pan and float switch are last defense. Verify the float is wired to cut power, not just to light an LED. Double-check that the secondary drain line terminates in a visible location, ideally above a window or a conspicuous downspout, so an overflow shows up fast.
If the drain connects to a plumbing stack, ensure the tie-in is above a trap with an air gap. Direct hard connections can transmit https://johnnyqhzx606.timeforchangecounselling.com/energy-savings-after-a-heating-replacement-what-s-realistic sewer gas into the air handler under negative pressure. I have traced “mystery odors” to exactly that detail more than once.
Controls, thermostats, and zoning sanity check
Controls are where theory meets habit. A thermostat left on factory defaults can undermine a sophisticated system.
Go through the installer settings menu. Confirm heat pump type, backup heat staging, compressor cycle limits, and minimum run times. For furnaces, set the blower off-delay to capture residual heat after the burner stops. Too short, and you waste heat in the exchanger. Too long, and you blow uncomfortably cool air, leading people to crank the setpoint.
Test every zone call on a multi-zone system. When zone A calls, do zones B and C stay quiet and comfortable or do they drift? If a single shared blower serves multiple dampers, listen for air noise when one small zone calls. Some systems need a bypass damper or a strategy that forces a second zone open to keep static pressure within limits. I prefer solutions that add return capacity or adjust blower speeds over bypassing conditioned air, but every house has constraints.
Pair the thermostat’s schedule with how the household actually lives. Aggressive set-back strategies used to make sense on older on-off equipment. With modulating furnaces and variable-speed heat pumps, deep nightly setbacks can trigger long, loud recovery runs and do not always save energy. A moderate 2 to 4 degree setback often balances comfort and economy.
Burn-in period: three days of observation
The first 72 hours after a heating replacement tell you a lot. I coach clients to pay attention to three things: noise trends, temperature consistency, and smells.
A faint metallic or oily odor is normal for the first few heating cycles as manufacturing residues bake off. It should fade within a day. If you still smell it after a week, open the cabinet and inspect for plastic wrapping left behind, dropped wire ties on the heat exchanger, or dusted insulation. Any sharp or sweet chemical smell calls for a closer look at refrigerant lines and cleaners used during brazing.
Noise that starts small and grows is a red flag. A rattle on duct startup might be a loose takeoff that will shear over time. A click that repeats every few minutes could be a relay chattering from low voltage. On a boiler, kettling or popcorn sounds indicate scaling or air. Write down when it happens, note the outdoor temperature, and share with the installer. Patterns help technicians hit the bull’s-eye on their first return visit.
Walk the house during a long run and feel the walls and floors. Unevenness shows up in places you do not often stand, like the far bedroom corner or the mudroom up two steps. Mark cold spots with tape and mention them. Often the fix is simple, like balancing a register, moving a thermostat away from a heat source, or adding a return path.
Verifying heat delivery and comfort
Numbers and senses complement each other. I use both.
Take room-by-room temperatures during steady-state operation. Note which rooms lag by 2 to 3 degrees and whether doors are open or closed. On forced air, measure supply air temperature at a few registers to see if the swing matches the unit’s temperature rise. If the furnace is running a 50-degree rise and you see one branch delivering only 20 degrees above return, something is bleeding heat or pulling in unconditioned air.
On hydronics, feel the return piping temperature and compare loops. A loop with a cold return while others are hot either has a stuck actuator, trapped air, or low flow. An infrared camera makes this trivial but even a $20 infrared thermometer does the job.
Do not forget humidity. Heating systems dry indoor air, especially older furnaces and non-condensing boilers that draw infiltration through the envelope. If your system includes a humidifier, verify operation and set a realistic target. At 30 degrees outside, 35 to 40 percent indoor humidity limits window condensation while keeping comfort high. Push it higher and you will see sweating frames and potential mold in wall cavities.
Post-install checks specific to different scenarios
No two heating unit installation projects look the same. A few scenarios deserve tailored attention.
Replacing a standard furnace with a high-efficiency condensing model introduces condensate management and PVC venting. The combustion air intake may reduce infiltration, which changes how the house breathes. Watch for higher indoor humidity and adjust ventilation if you see condensation where you did not before.
Swapping an oil boiler for a gas condensing boiler often reveals sludge in old radiators and piping. Even if the installer flushed, micro-debris continues to circulate for weeks. A magnetic dirt separator pays for itself quickly here. Check its canister after a month; you may be surprised by the captured fines.
Installing a heat pump in a formerly fossil-only home changes electrical load. The outdoor unit may share a service with other large draws like an electric range or EV charger. If lights dim when the compressor starts, have an electrician evaluate service capacity or add a soft-start kit approved by the manufacturer.
When zoning is added during heating replacement, be cautious about creating tiny zones on a large air handler. A single 100 square foot office calling alone will drive static pressure sky high unless the system is engineered for that use. Consider minimum zone sizes, pressure relief strategies, and blower turndown. Otherwise, expect noise and short cycling.
Final test: efficiency and safety
After a week of operation, return to the system and remeasure critical numbers under normal loads. On gas equipment, combustion readings can shift as seals warm and the vent system dries out. On heat pumps, measure current draw and delivered air temperature on a cold morning, not just the mild day of install.
Check carbon monoxide levels in living spaces with a low-level monitor, not just a builder-grade alarm. Anything above single digits during steady operation is a concern. Test the smoke and CO alarms that share the space with the heating equipment, particularly if the install required new wiring or panel work.
For forced air, measure energy use over a day with a smart plug on the air handler or with the utility’s hourly data if available. For boilers, track run time on the burner and compare to degree-days for a rough sanity check. You do not need precision to spot outliers. If usage is double what neighbors with similar homes report, start digging.
Homeowner orientation that actually sticks
A proper handoff is part of the post-install check. I avoid jargon and focus on the three or four tasks that matter.
Show filter location and size. If your system uses a deep media filter, write the size on the door with a marker and post the change interval. Explain that a filter too clean can be a problem when airflow was tuned for a certain pressure drop; this is relevant if someone tries to substitute a cheap fiberglass filter after you optimized with a pleated media.
Demonstrate how to silence and reset. If the safety float on the condensate pan trips, show the client where it is and why not to bypass it. Walk through thermostat menus they will use and lock away menus they should not. Take ten minutes to set up the app and alerts while you are still there.
Set expectations about noise, smells, and energy use for the first month. People tolerate quirks better if they know they are normal and temporary. Explain what is not normal, such as dripping from the furnace cabinet, repeated outdoor unit icing, or a breaker that trips.
A compact, high-impact post-install checklist
- Record all model and serial numbers, register warranties, and photograph wiring diagrams and rating plates. Verify safety devices: door switch, float switch, gas shutoff, emergency switch, CO and smoke alarms. Measure and record key numbers: static pressure, temperature rise, combustion readings, refrigerant targets. Inspect and test drains, vents, and terminations, including slope, traps, and clearances. Confirm controls and comfort: thermostat setup, zoning behavior, lockouts, quiet operation, even temperatures.
Tape that list in the mechanical room. It keeps everyone honest, including the future you who gets called back in six months.
Common pitfalls that surface after installers leave
I see the same patterns across regions and brands. Anticipate these and you will avoid repeat visits.
Overly restrictive filtration after a heating replacement is a quiet thief. That shiny MERV 16 filter might look like a good idea, but unless the cabinet and blower were sized for it, you will hear whistles, see high static pressure, and burn more electricity to move less air. Choose a media cabinet sized to keep the pressure drop under control at your design airflow.
Poorly sealed return ducts in basements and attics drag in dusty, cold air and lower delivered temperature. Even a few beads of mastic on obvious seams can raise supply temperatures by 5 to 10 degrees at far registers. Focus on returns first; leaks there depressurize the house and make every other leak worse.
Improper condensate neutralization on condensing boilers shows up slowly as pitted floor drains, stained concrete, and rust on nearby equipment. If your drain line is metal or the discharge path crosses vulnerable materials, insist on a neutralizer. Media cartridges are cheap and last a heating season or more depending on run time.
Thermostat location sabotages comfort more often than anyone admits. A new smart stat near a sunny kitchen reads a few degrees warm on winter mornings and shuts the system early. A move of six feet around a corner changes everything. Make that call early, not after months of frustration.
When to call the installer back
There is a line between normal settling and a problem that deserves a professional visit. Call if you see any water where it should not be, ice on refrigerant lines in heating mode, repeated lockouts, or CO readings above ambient. Call if rooms lag more than 3 degrees after balancing registers and letting doors stay open, or if you need to change the filter more often than every one to three months under normal use. The installer should welcome a return visit in the first season. It is as much in their interest as yours to dial in performance.
The long view
A heating system is a living part of the house. Ducts expand and contract, valves seat and reseat, control boards learn patterns, and occupants change habits. The best heating system installation, regardless of brand, is one that is verified under real conditions and adjusted with the house as it is, not as the plans imagined it.
Treat the post-install period as part of the installation, not an afterthought. Make measurements, listen carefully, adjust gently, and let data guide decisions. Those extra hours now pay dividends for years, in quiet rooms, even temperatures, and utility bills that match the promise that led you to invest in heating replacement in the first place.
Mastertech Heating & Cooling Corp
Address: 139-27 Queens Blvd, Jamaica, NY 11435
Phone: (516) 203-7489
Website: https://mastertechserviceny.com/